

Larry Horsfield returns with his Adventure writing helmet on again ...
As mentioned last month, you cannot pick up the horse. To ensure this we must place an entry in process table 1 to limit the amount and weight of objects carried. I will also show you how to place an entry In a certain position in a process table.
Select process table 1 and type {I} The number at the end indicates to PAW that we wish this entry to be the FIRST * * entry in the table. Now enter {ABILITY 10 10}. This tells PAW the player can carry 10 objects with a total weight of ten units. Note that objects worn are NOT included when PAW is checking objects carried but their weight IS.
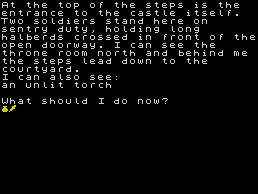
You should get hold of the torch, that's what you should do next matey. But what next? |
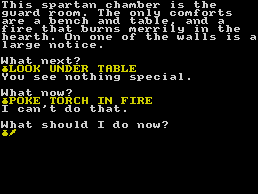
Always cover all possibilities. Are 'Poke torch' and 'Light' the same? |
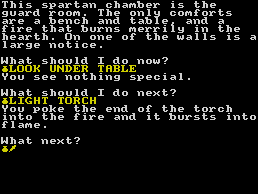
Now you can see under the table. |
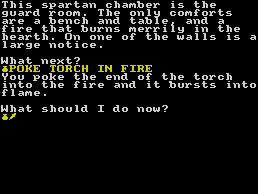
And now 'Poke' works too. Hurrah! |
Now we can test the adventure once again, and this time there are objects in some of the locations which we can manipulate! However, the screen display looks a bit untidy; as In locations where you can see an object, the message "I can also see:" Is printed on a new line with the object underneath as in figure 2. Perhaps it would look neater if the message was printed after the full stop of the location text with the object listed after. Easily done!
First of all quit the test adventure by selecting option N, the system messages texts. Amend system message (sysmess) 1 by deleting the colon (:) at the end but leaving the blank space. Also amend sysmess 48 by pressing DELETE to get rid of the "carriage return" then press SPACE to put a blank space after the full stop. Next go to process table 1 and amend the first * * entry - which we inserted as above - as follows: {ABILITY 10 10 LET 53 64}. When flag 53 is given the value 64, all object lists are printed as sentences.
Next amend the first of the two existing "* _" entries, which determine how the object lists are displayed, to delete the NEWLINE condition, then insert a new * entry BETWEEN the second and third entries that just contain the condition NEWLINE i.e. {I * _ 2} {NEWLINE}. If you now test the adventure you will see that the screen display looks much neater.
However if you were to GET the TORCH and then type I to display your inventory, you will see that the object is still on the next line underneath the message "I have with me". If you switch to the response table and press P to screenprint the table, you will see the two entries "I" and "GET I" which both use the INVEN action. This will always print the object lists in a column, so we must use another method to print our inventory. First of all, return to the System Messages table, option N, and amend SYSMESS 10 to read {I am wearing }. Now switch to the response table and amend both the I and GET I entries so that instead of INVEN, each has the following:
{SYSMESS 9 LISTAT 254 NEWLINE SYSMESS 10 LISTAT 253 NEWLINE DONE}
Actually, the GET I entry could be deleted from the database, as very few adventurers use that input these days.
If you now test the adventure again and, after picking up a few objects, press I, the display looks even better, as in figure 3. You may however have noticed that if you continue to press, for example, I to display your inventory, the location text will scroll off the top of the screen. Some adventure players prefer this, but most like the location text to remain displayed while the inputs scroll underneath. This can be easily set with the MODE condition.
Go back to process table 1 and amend the first * * entry, adding the line {MODE 4 1 }, so that the whole entry reads: ABILITY 10 10 LET 53 64 MODE 4 1. You must also amend the third * entry so it reads NEWLINE. If you now test the adventure and make several "I" inputs you will see them scroll up under the location text.
Another thing we can do to improve the look of the adventure is to change the standard Spectrum character set that is resident in PAW for one that is more pleasing to the eye. On the B side of the PAW cassette (or the A side of the disk) there are 22 different character sets, any 5 of which can be loaded into a database. We will load character set 8 into our mini-adventure.
Select option Q, characters, from the MM and, if you press P from the SM, you will see that only the UDGs (User Definable Graphics) and the shades are present. To be able to load a character set in we must first insert a "blank" set of standard Spectrum characters. To do this press I then ENTER. If you press P you'll see the set is displayed. Now, from the SM, type L 1 and then, when asked for the name of the file, type SET8 (note the absence of a space) and press ENTER. If you have a disk version of PAW, the set will load from the disk, but tape users will have to wind the tape on to the correct position. Loading the set only takes a short while and, once loaded you can view the set by pressing P.
Having done that, go to the MM and select option B, the background colours. We do not intend to alter the border, paper and Ink colours, (black, black and white) so type 0, 0 and 7 when prompted.
When prompted for the character set number, type 1. The whole database will now use the newly loaded character set which I'm sure you will agree, looks a whole lot better.
Right then, having improved the look of our adventure, let's put in some gameplay. As the plot says, your helmet and chain mail are hidden somewhere, which is why in the Initially At table they are not created. To find these we must SEARCH or LOOK for them. We will imagine that your helmet has been hidden under the bench in the guard room and your chainmail in the straw in the stable.
We have to SEARCH the STRAW and LOOK UNDER the BENCH to find the objects. Also, in order to see in the armoury we will need to be able to light the torch, which you will do in the guard room (from the fire!). Go to the vocabulary table and insert the following verbs and nouns with the numbers as shown:
Verbs: SEARC 36 LIGHT 37 EXTIN 38
Nouns: BENCH 58 STRAW 59 FIRE 60
Now go to the message table and insert the following messages:
| Message 8: | {What's this you've found under the bench? It's your helmet, which you pick up.} |
| Message 9: | {You search the straw revealing an object.....} |
| Message 10: | {You poke the end of the torch into the fire and it bursts into flame.} |
| Message 11: | {You find nothing of any use.} |
| Message 12: | {You see nothing special.} |
Go to the response table and insert the following entries:
| LOOK BENCH | PREP UNDER |
| AT 7 | |
| ZERO 12 | |
| MESSAGE 8 | |
| PLACE 2 254 | |
| SET 12 | |
| DONE | |
| SEARCH STRAW | AT 3 |
| ZERO 13 | |
| MES 9 | |
| ANYKEY | |
| CREATE 3 | |
| SET 13 | |
| DESC | |
These two entries show two ways of revealing hidden objects. Note the use of the flags to prevent the entries being implemented again if the inputs are repeated by the player. If the player did repeat the input SEARCH STRAW, the response would be 'I can't do that.' which isn't very good. So, insert the following two entries in response to give more positive responses, and also amend the EXAMI _ entry as below:
| SEARC _ | MESSAGE 11 |
| DONE | |
| LOOK _ | MESSAGE 12 |
| DONE | |
| EXAMI _ | MESSAGE 12 |
| DONE |
The use of the underline symbol will make these the last entries using the verbs SEARC, LOOK and EXAMI. You could also, as many adventure authors do, abbreviate the word EXAMI to EXAM and even, as I do, just 'X'. Now to deal with the torch. We will need two entries in response to cover lighting and extinguishing the torch, and we will need two process tables as well. First of all, though we need to insert a few more messages, thus:
Message 13: {The torch is }
Message 14: {unlit. }
Message 15: {lit. }
Now go to the Process table 2 and "begin" two new tables, 3 and 4. Switch back to response and insert the following two entries:
| EXTIN TORCH | PROCESS 4 |
| DONE | |
| LIGHT TORCH | AT 7 |
| PROCESS 3 | |
| DONE |
Now select process table 3 and insert the following entries:
| * * | CARRIED 0 | * * | CARRIED 1 | |
| MES 13 | MESSAGE 10 | |||
| MESSAGE 15 | SWAP 1 0 | |||
| DONE | DONE | |||
| _ _ | SYSMESS 8 | |||
| DONE | ||||
The entries needed for process 4, in which we will extinguish the torch:
| * * | CARRIED 0 | * * | CARRIED 0 | |
| MES 13 | ZERO 0 | |||
| MESSAGE 14 | SWAP 1 0 | |||
| DONE | OK | |||
| * * | CARRIED 0 | _ _ | SYSMESS 8 | |
| NOTZERO 0 | DONE | |||
| SYSMESS 15 | ||||
| PAUSE 75 | ||||
| SWAP 0 1 | ||||
| DESC | ||||
There are two entries which deal with extinguishing the torch because if you put it out in a bright situation, there is no need to redescribe the location, whereas in a light location we need to show it is now dark. The SYSMESS 8 entries in each table print "You can't do that." if you are not carrying either torch. After inserting all the above entries, test the adventure again and, after picking up the torch, input LIGHT TORCH and EXTIN TORCH in various locations and both carrying and not carrying both torches. Now when you enter the armoury, you will see and be able to pick up the sword.
Now, the player of this adventure may try a different input to light the fire, for example POKE TORCH IN FIRE, as suggested by the message that appears on the screen when you LIGHT THE TORCH, and we should try to anticipate such inputs from the player.
Insert the verb POKE as verb number 39 in the vocabulary, giving it the synonyms INSER(t)and HOLD if you wish (and any other words you think might have the same meaning). Switch to the response table and insert the following entry:
POKE TORCH PREP IN
NOUN2 FIRE
AT 7
PROCESS 3
DONE
While we are in the guard room, you'll see there is a notice on the wall. We will use this to illustrate another PAW technique that, in a normal full size adventure, can save you memory. Regarding the notice there are two things you can do with it, i.e. EXAMINE IT or READ IT. Now in some adventures you might find that the author has used a different message for the response to each of these inputs. Insert the following message:
Message 16 The notice on the wall reads:
NO SPITTING IN THE FIRE!
Now insert the verb READ in the vocabulary, verb number 40 and the noun NOTIC, noun number 61. Switch to the response table and insert the following two entries:
EXAMI NOTICE LET 33 40
| READ NOTICE | AT 7 |
| MESSAGE 16 | |
| DONE |
The first entry tells PAW to make flag 33, which holds the verb number of the players last input, change to value 40, which of course is the number for the verb READ. As long as there is an entry READ NOTICE, it will be acted upon. You can also do the same for any of the words in an entry using flags 34 to 45. See the PAW manual for which words they refer to. You should note, however, that when using such entries in your database you can only alter words with a larger value than the first one. For example, you can alter words EXAMI to READ, 30 to 40, but you cannot alter SEARC to LOOK, 36 to 33.
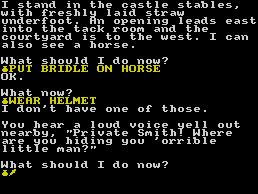
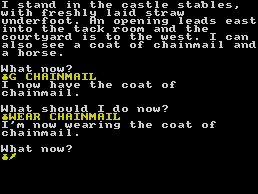
If you now test the adventure you can do everything in the game except put the saddle and bridle on the horse and ride it.
 |
 |
| Sounds like trouble. Is time running out for our hero? Get the rest of the equipment. | Now you're almost sorted. The final part of the adventure is next month. Join me then. |
That brings me to the end of this instalment of my PAW mini-adventure programming article. You should now insert a blank tape into your datacorder or a blank, formatted disc into your disc drive and then select option M from the main menu to save your database. If you are using a disc version of PAW use the filename START for one save, then save the database again using a different name i.e. DAWN. you should always make at least two copies of any database as a precaution. See you next month.
Previous article in series (issue 130)
Next article in series (issue 132)